The G chord is one of the most common guitar chords used in rock, pop, country, and folk songs. It’s also one of the easier chords to play so, if you don’t know it yet, it’s a good one to learn next. It does require a bit of a stretch between your 2nd and 3rd fingers, but most people get used to this pretty quickly. Just take it slowly at first and you’ll do fine.
In this lesson, I’ll show you how to play the G chord using a couple of different fingerings. (If you haven’t seen it yet, I suggest you check out the lesson on playing the E minor chord first. In that lesson, I explain some important fundamentals about playing any chord.)
The “Standard” G Chord Shape
The key to fingering the G chord is playing a G (3rd fret) on the low E string with your 2nd finger at the same time that you play a G (also 3rd fret) with your 3rd finger on the high E string, like so:
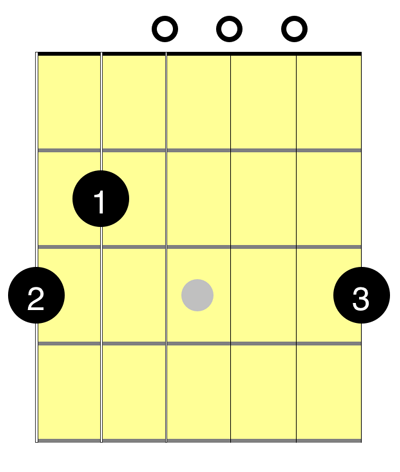
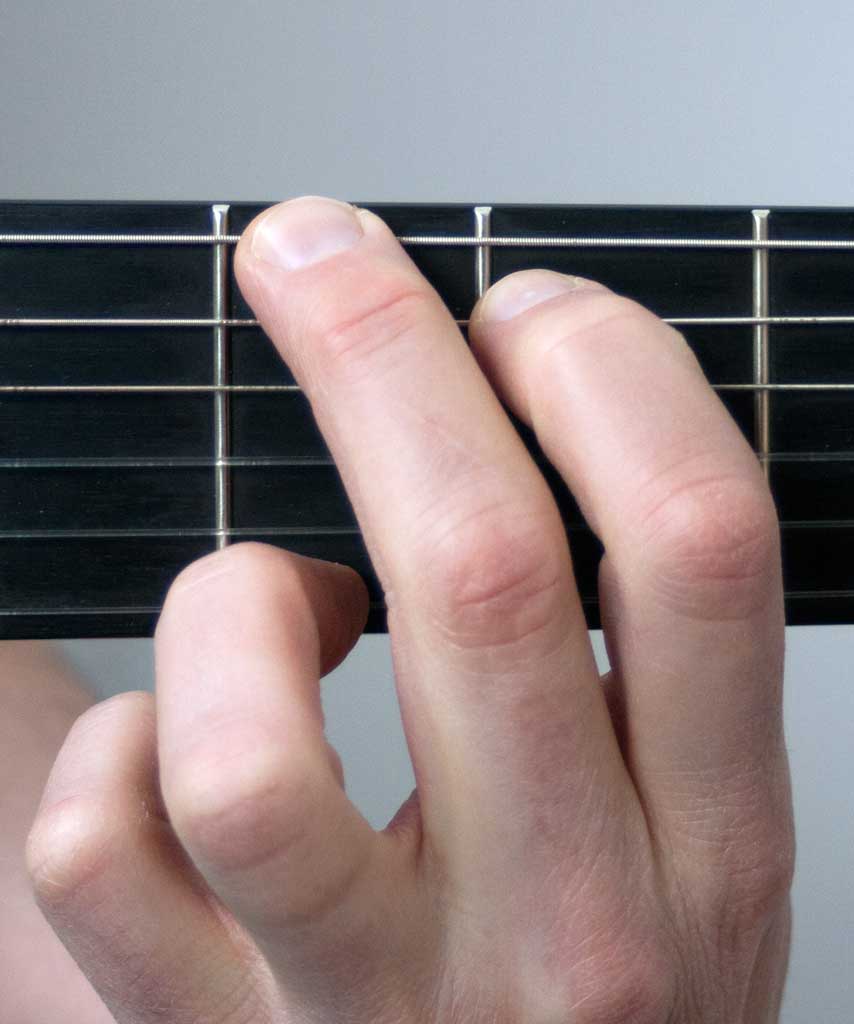
Notice that you also need to play B on the 2nd fret of the A string with your first finger. To hear this note clearly, you need to make sure that you’re using the tip of your 2nd finger to play that G on the 3rd fret of the low E string. Otherwise, your 2nd finger will come in at too flat of an angle and it will either mute the A string or make it buzz. Here’s a photo that shows what I mean:
Notice how the 2nd finger is kind of laying on top of the A string, muting it. You don’t want that because then you can’t hear the B note that the 1st finger is playing. Also, instead of muting the string, your finger might be just barely touching it. This will probably make it buzz, and that’s not going to sound good.
So this is just another reminder to always try to play with the tips of your fingers. Also, press down on each note accurately, instead of mashing your finger onto the fretboard like some kind of clumsy oaf.
One other thing to watch out for when playing the G chord is the angle and bend of the 3rd finger as it plays on the first string. It’s very common for beginners to bend that finger backwards, as shown in this photo. This puts unnecessary tension on the finger and hand. (Notice that tell-tale white knuckle.) It also usually means you’re flattening out that finger instead of playing with the tip.
Instead, you want that finger to come down onto the fretboard at a natural angle as shown above.

G Chord Variations
Next we’ll take a look at a few other common fingerings for the same open G chord shape. (There are other movable G chord shapes too, but we won’t cover them here.)
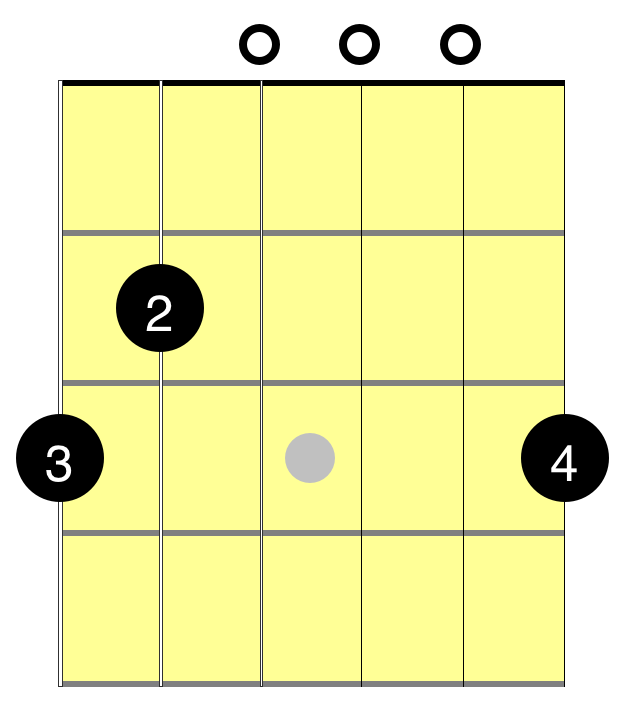
Variation #1
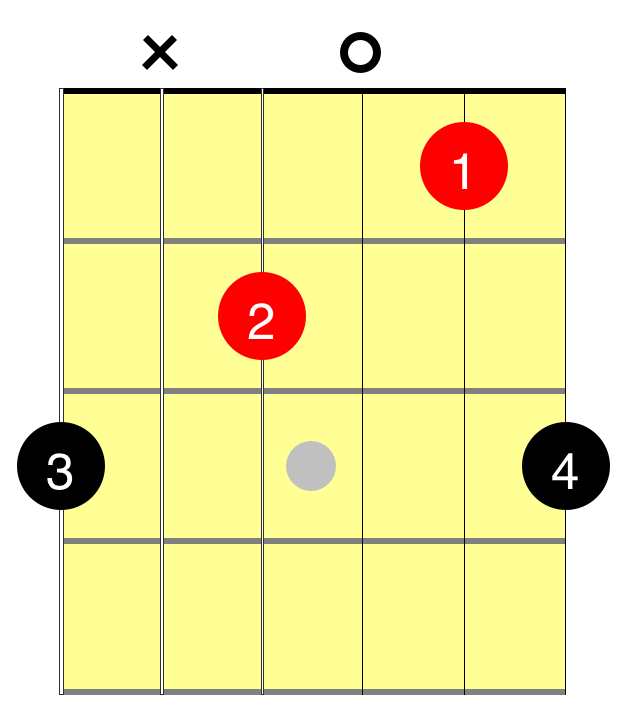
This is the same chord shape as above, but notice the different fingering. The two G notes on the low E and high E strings are played by the 3rd and 4th fingers. This is a really useful fingering because it leaves your two other fingers free to play other notes. In particular, it’s extremely common to alternate between the G chord and a C chord, as shown on the right. This chord is actually a C/G chord—pronounced “C over G chord”—which means a C chord with a G note played in the bass. The two different notes that make this a C/G chord are shown in red.
So the idea is that your 3rd and 4th fingers stay planted on the outer strings while the other fingers move to switch between the G and C/G chords. If you’re feeling confident with the “standard” G chord shown above, try playing this one, and try switching between the G and C/G chords. This back and forth is done all the time in acoustic music like folk, country, and blues—especially when fingerpicking. See the first 10 seconds of this Lumineers cover of a Bob Dylan classic for an example.
Variation #2
This variation is very similar to the standard chord fingering shown above. The only difference is that you play the D note on the 3rd fret of the B string instead of letting the open string ring out. It has a slightly different sound than the standard fingering but they’re pretty similar.

Even though this looks pretty much the same as the standard fingering, it’s a useful variation because that 3rd finger can act as a pivot finger. A pivot finger is a finger that you leave on the fretboard when you move from one chord shape to another. You don’t lift it up when you lift up the other fingers. This provides a solid support, making it easier to quickly switch your fingers to the new chord shape. This is very common when switching between open G and D chords, because that 3rd finger stays on the same note for both chords. I’m not going to get any further into pivot fingers now—that deserves its own lesson. But try playing the G chord this way too because it’ll be useful later.
Practice!
Now you know a few different ways to play a G chord. Woohoo! Now get out there and practice it. Anytime you learn a new chord, you should check in with yourself: “Can I hear each note clearly?” “Is there any buzzing?” “Does my hand hurt like hell?” Adjust as necessary.
You also want to practice switching chords, so work on switching between G and any other chords you know. Go slowly. Focus on accuracy, not speed.